Fulfilling Requests
With your own Oracle contract, you can use your own node to fulfill requests. This guide will show you how to deploy your own Oracle contract and add jobs to your node so that it can provide data to smart contracts.
Requirements
Before you begin this guide, complete the following tasks to make sure you have all of the tools that you need:
- Complete the Beginner Walkthrough to obtain Testnet LINK and set up MetaMask.
- Configure an Ethereum client with an active websocket connection. Either Run an Ethereum Client yourself or use an External Service that your Chainlink Node can access.
- Run a Chainlink Node and connect it to a supported database.
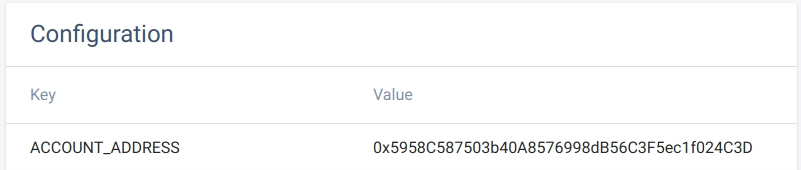
- Fund the Ethereum address that your Chainlink node uses. You can find the address in the node Operator GUI under the Keys tab. The address of the node is the
Regulartype. You can obtain test ETH from several faucets.- For Chainlink nodes versioned 0.9.6 and earlier, find the Ethereum address in the Configuration tab in the
ACCOUNT_ADDRESSfield.
- For Chainlink nodes versioned 0.9.6 and earlier, find the Ethereum address in the Configuration tab in the
Address Types
Your node works with several different types of addresses. Each address type has a specific function:
- Node address: This is the address for your Chainlink node wallet. The node requires native blockchain tokens at all times to respond to requests. For this example, the node uses ETH. When you start a Chainlink node, it automatically generates this address. You can find this address in the Node's GUI under
ACCOUNT_ADDRESS. - Oracle contract address: This is the address for contracts like
Operator.solorOracle.solthat are deployed to a blockchain. Do not fund these addresses with native blockchain tokens such as ETH. When you make API call requests, the funds pass through this contract to interact with your Chainlink node. This will be the address that smart contract developers point to when they choose a node for an API call. You can find this address in the Node's GUI underYOUR_ORACLE_CONTRACT_ADDRESS. - Admin wallet address: This is the address that owns your
Operator.solorOracle.solcontract addresses. If you're on OCR, this is the wallet address that receives LINK tokens.
Deploy your own Oracle contract
Go to Remix and open the
Oracle.solsmart contract.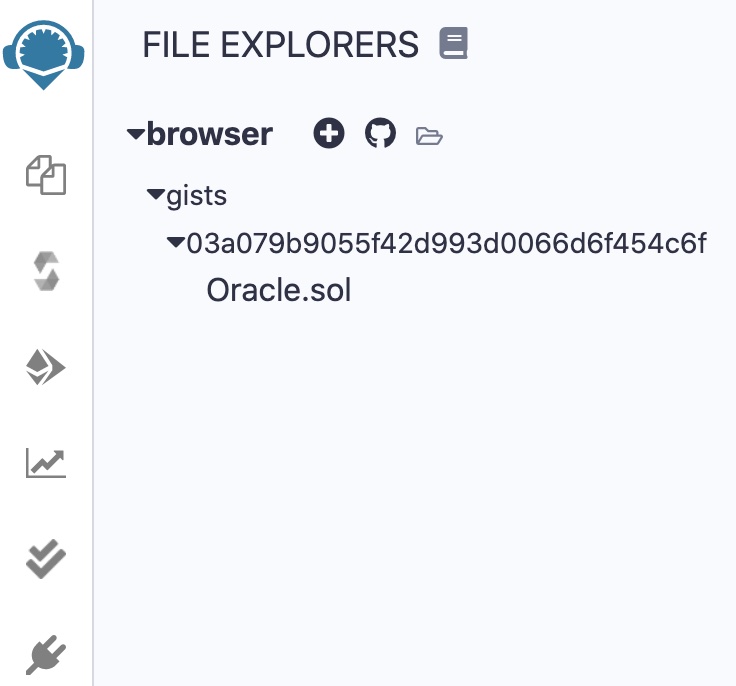
Click the
Oracle.solfile. The contents of this file will be very minimal.On the Compile tab, click the Compile button for
Oracle.sol. Remix automatically selects the compiler version and language from thepragmaline unless you select a specific version manually.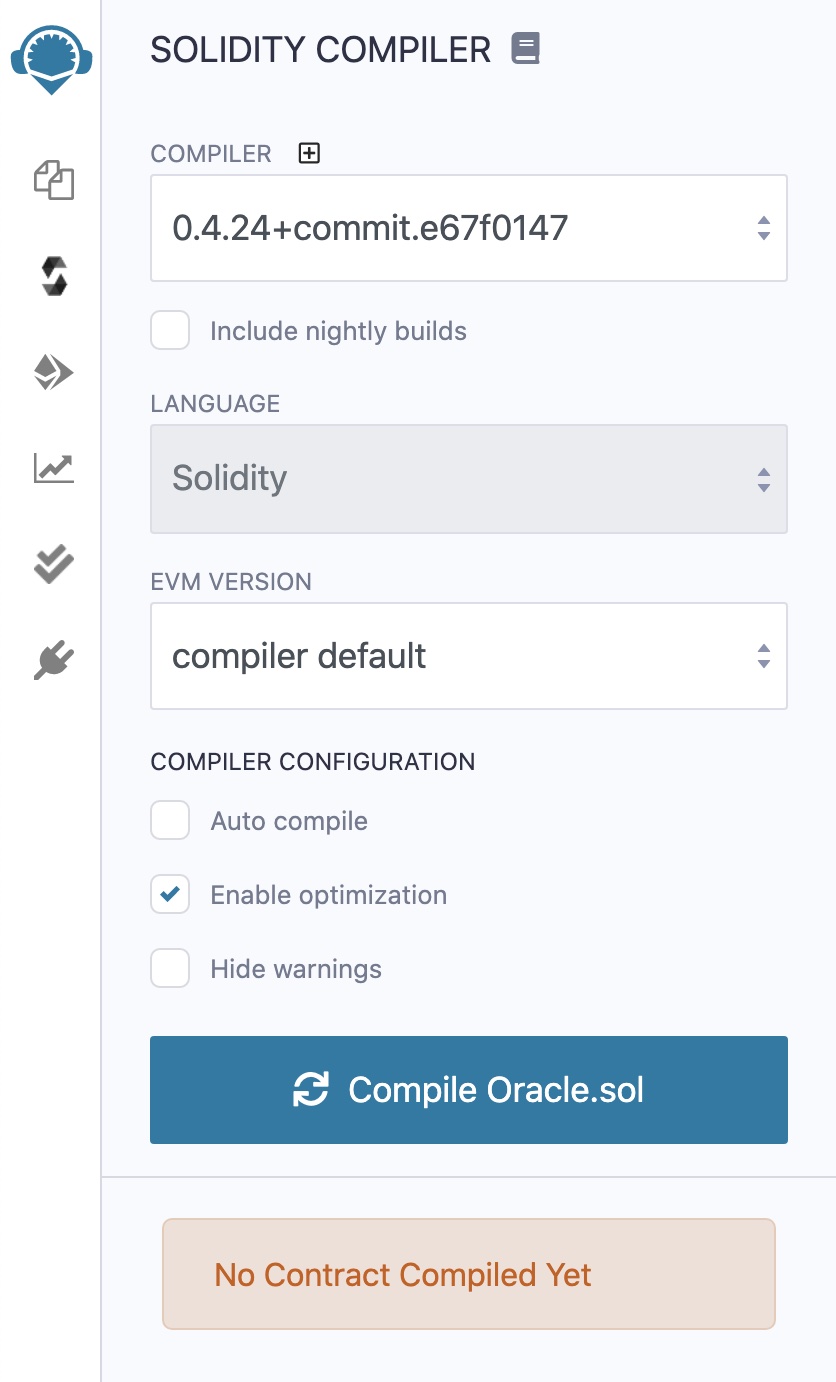
On the Deploy and Run tab, configure the following settings:
Select "Injected Web3" as your Environment. The Javascript VM environment cannot access your oracle node.
Select the "Oracle" contract from the Contract menu.
Copy the LINK token contract address for the network you are using and paste it into the
address_linkfield next to the Deploy button. Use one of the following network addresses:0x01BE23585060835E02B77ef475b0Cc51aA1e07090xa36085F69e2889c224210F603D836748e7dC00880x514910771AF9Ca656af840dff83E8264EcF986CA
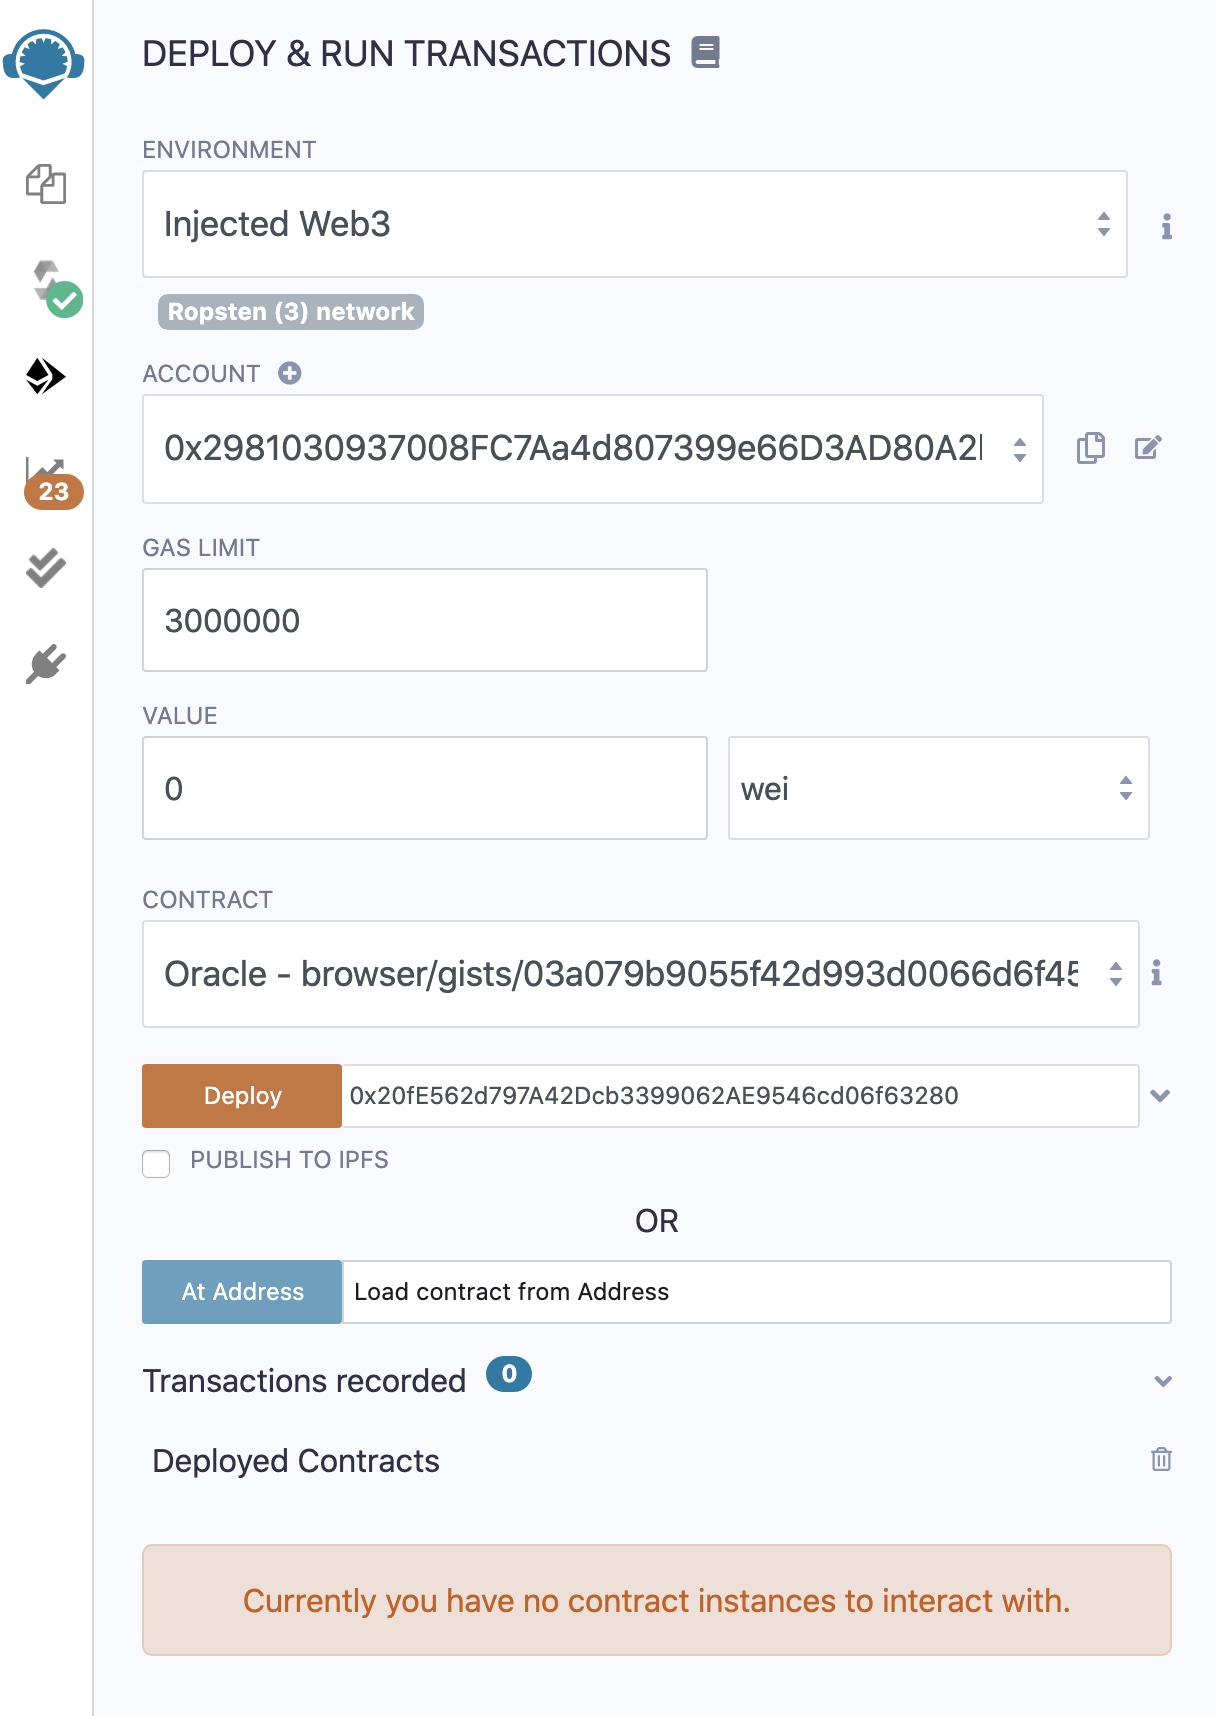
Click Deploy. MetaMask prompts you to confirm the transaction.
MetaMask doesn't pop up?
If MetaMask does not prompt you and instead displays the error below, disable "Privacy Mode" in MetaMask. You can do this by clicking on your unique account icon at the top-right, then go to the Settings. Privacy Mode will be a switch near the bottom.
Error: Send transaction failed: Invalid address. If you use an injected provider, please check it is properly unlocked.
After you deploy the contract, a link to Etherscan displays at the bottom. Open that link in a new tab to keep track of the transaction.

If the transaction is successful, a new address displays in the Deployed Contracts section.

Keep note of the Oracle contract address. You need it later for your consuming contract.
Add your node to the Oracle contract
Find the address for your Chainlink node and add it to the Oracle contract.
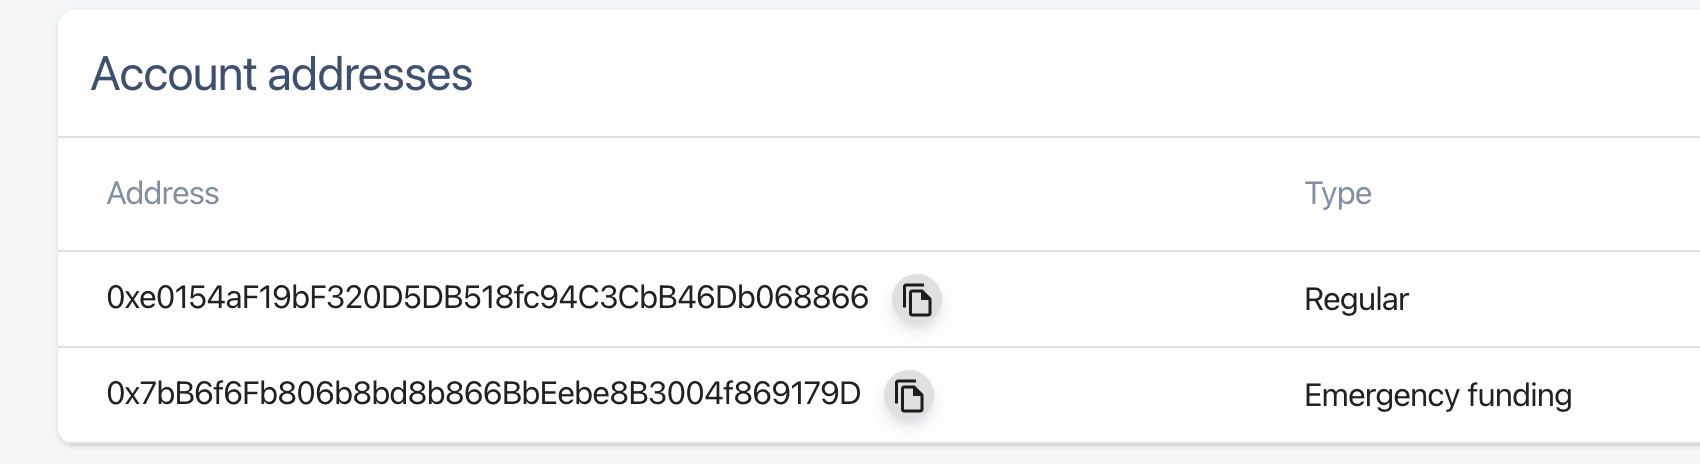
In the Chainlink Operator GUI for your node, find and copy the node address:
Version 0.9.7 and newer: Find the address at the bottom of the Keys page in the Account addresses section.
Version 0.9.6 and earlier: Find the address on the Configurations page.
In Remix, call the
setFulfillmentPermissionfunction with the address of your node, a comma, and the valuetrue, as the input parameters. This allows your node to fulfill requests to your oracle contract.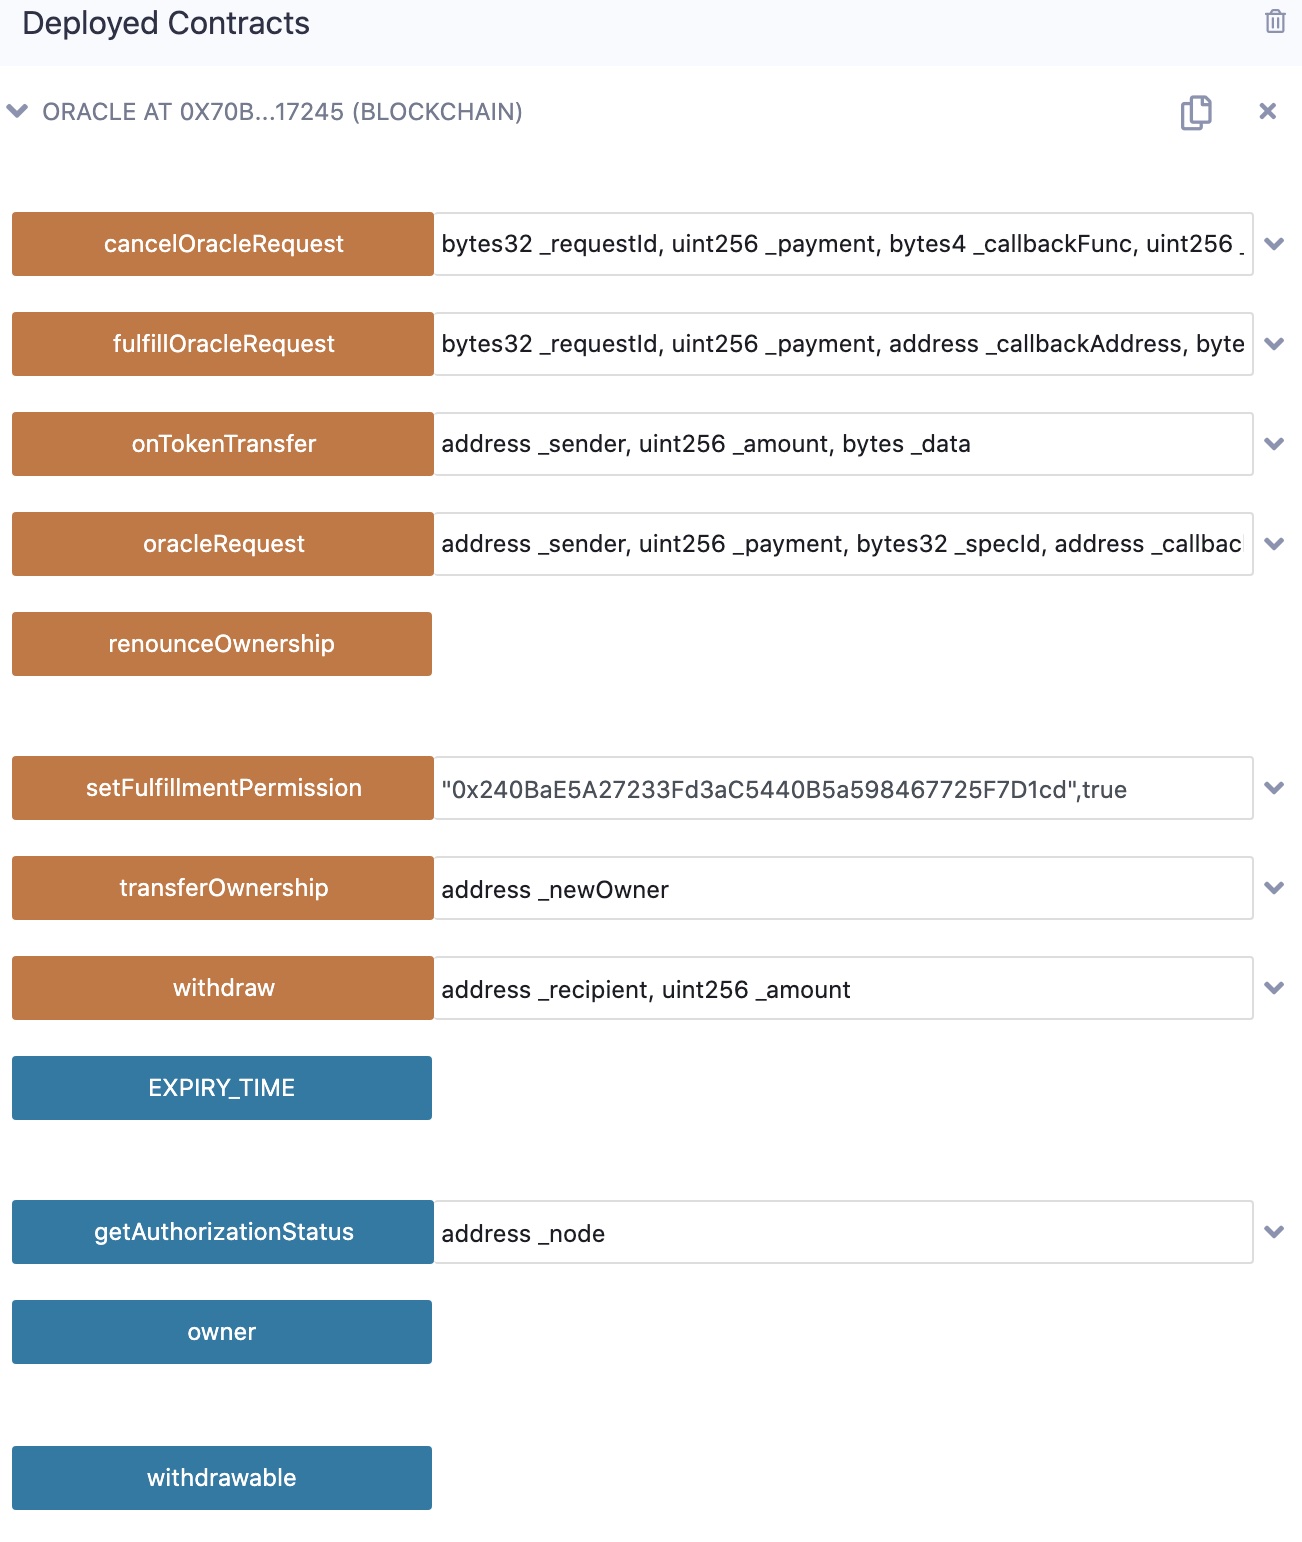
Click the
setFulfillmentPermissionfunction to run it. Approve the transaction in MetaMask and wait for it to confirm on the blockchain.
Add jobs to the node
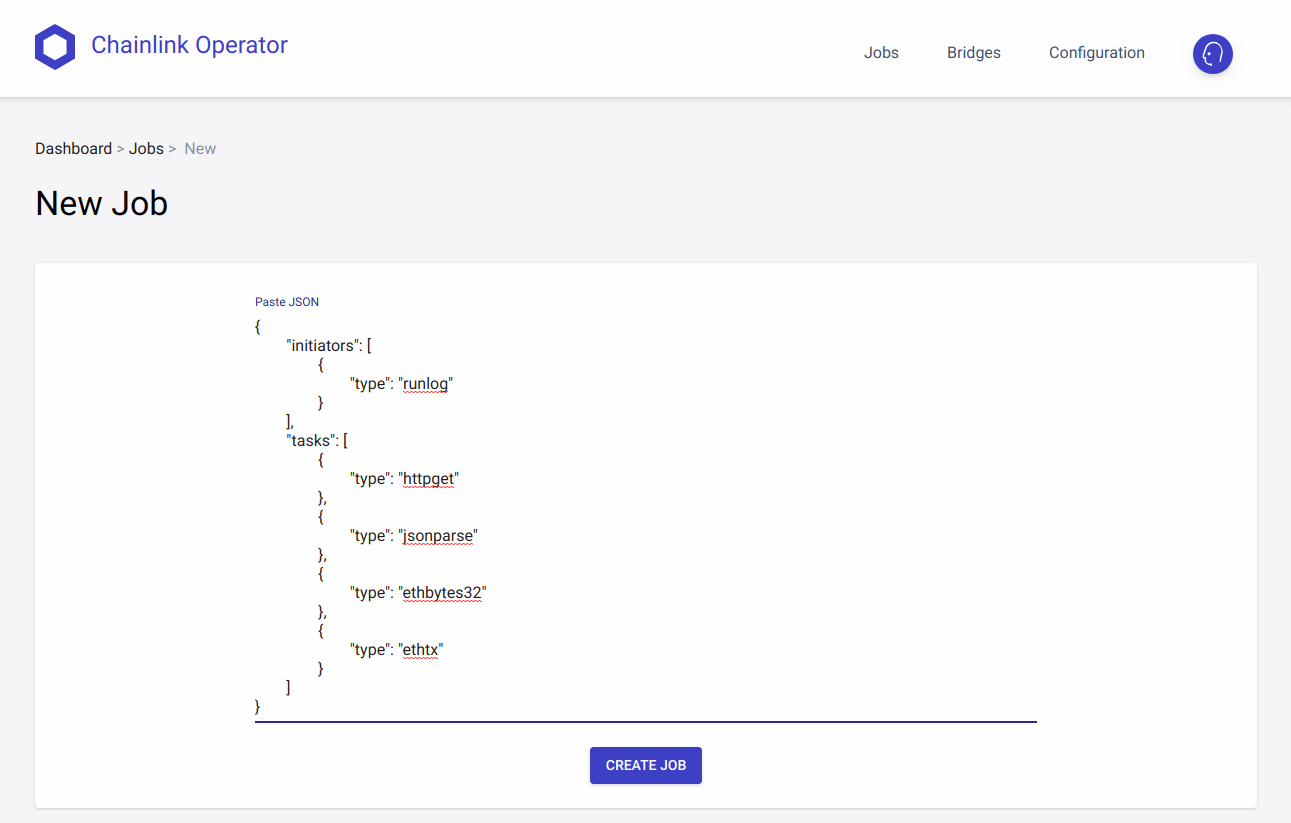
You can add jobs to your Chainlink node in the Chainlink Operator GUI. Use the example Job Specifications below.
If using Chainlink version 0.9.4 or above, you can add a name to your job spec.
{
  "name": "Get > Bytes32",
  "initiators": [
    {
      "type": "runlog",
      "params": {
        "address": "YOUR_ORACLE_CONTRACT_ADDRESS"
      }
    }
  ],
  "tasks": [
    {
      "type": "httpget"
    },
    {
      "type": "jsonparse"
    },
    {
      "type": "ethbytes32"
    },
    {
      "type": "ethtx"
    }
  ]
}
{
  "name": "POST > Bytes32",
  "initiators": [
    {
      "type": "runlog",
      "params": {
        "address": "YOUR_ORACLE_CONTRACT_ADDRESS"
      }
    }
  ],
  "tasks": [
    {
      "type": "httpget"
    },
    {
      "type": "jsonparse"
    },
    {
      "type": "ethbytes32"
    },
    {
      "type": "ethtx"
    }
  ]
}
{
  "name": "Get > Int256",
  "initiators": [
    {
      "type": "runlog",
      "params": {
        "address": "YOUR_ORACLE_CONTRACT_ADDRESS"
      }
    }
  ],
  "tasks": [
    {
      "type": "httpget"
    },
    {
      "type": "jsonparse"
    },
    {
      "type": "multiply"
    },
    {
      "type": "ethint256"
    },
    {
      "type": "ethtx"
    }
  ]
}
{
  "name": "Get > Uint256",
  "initiators": [
    {
      "type": "runlog",
      "params": {
        "address": "YOUR_ORACLE_CONTRACT_ADDRESS"
      }
    }
  ],
  "tasks": [
    {
      "type": "httpget"
    },
    {
      "type": "jsonparse"
    },
    {
      "type": "multiply"
    },
    {
      "type": "ethuint256"
    },
    {
      "type": "ethtx"
    }
  ]
}
{
  "name": "Get > Bool",
  "initiators": [
    {
      "type": "runlog",
      "params": {
        "address": "YOUR_ORACLE_CONTRACT_ADDRESS"
      }
    }
  ],
  "tasks": [
    {
      "type": "httpget"
    },
    {
      "type": "jsonparse"
    },
    {
      "type": "ethbool"
    },
    {
      "type": "ethtx"
    }
  ]
}
In the Chainlink Operator GUI on the Jobs tab, click New Job.

Paste the job specification from above into the text field.
Replace
YOUR_ORACLE_CONTRACT_ADDRESSwith the address of your deployed oracle contract address from the previous steps. This address is different than theACCOUNT_ADDRESSfrom your Chainlink node.Click Create Job. If the node creates the job successfully, a notice with the job ID appears. Take note of this job ID. You need it later.

Repeat this process for each of the remaining jobs above until all of the jobs are added.
The address for each job auto-populates with the zero-address. This means the Chainlink node will listen to your job ID from any address. You can also specify an address in the params object of the RunLog initiator for your oracle contract.
Create a request to your node
If you're going through this guide on Ethereum mainnet, the TestnetConsumer.sol contract will still work. However, understand that you're sending real LINK to yourself. Be sure to practice on the test networks multiple times before attempting to run a node on mainnet.
After you add jobs to your node, you can use the node to fulfill requests. This section shows what requesters do when they send requests to your node. It is also a way to test and make sure that your node is functioning correctly.
On the Compiler tab, click the Compile button for
TestnetConsumer.sol.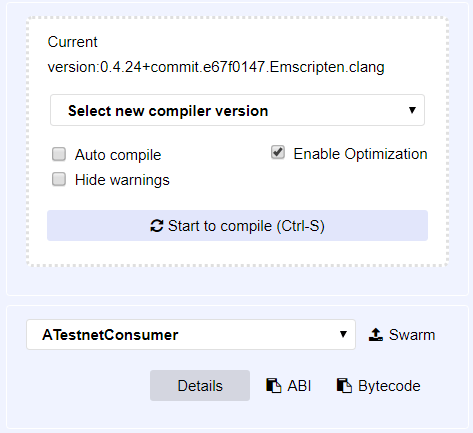
On the Deploy and Run tab, configure the following settings:
- Select "Injected Web3" as your environment.
- Select "ATestnetConsumer" from the Contract menu.
- Copy the address for the network you are using and paste it into the
address_linkfield next to the Deploy button.
Click Deploy. MetaMask prompts you to confirm the transaction.
Fund the contract by sending LINK to the contract's address. See the Fund your contract page for instructions. The address for the
ATestnetConsumercontract is on the list of your deployed contracts in Remix.After you fund the contract, create a request. Input your oracle contract address and the job ID for the
Get > Uint256job into therequestEthereumPricerequest method. Separate the contract address and the job ID by a comma.
Click the request method button and you should see your node log the request coming in and its fulfillment. After the transaction from the node is confirmed, you should see the value updated on your contract by clicking on the
currentPricebutton.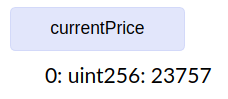
Withdrawing LINK
You can withdraw LINK from the Oracle contract. In Remix under the list of deployed contracts, click on your Oracle contract and find the withdraw function in the function list. Note that the testnet consumer contract also has a withdraw function that is different.
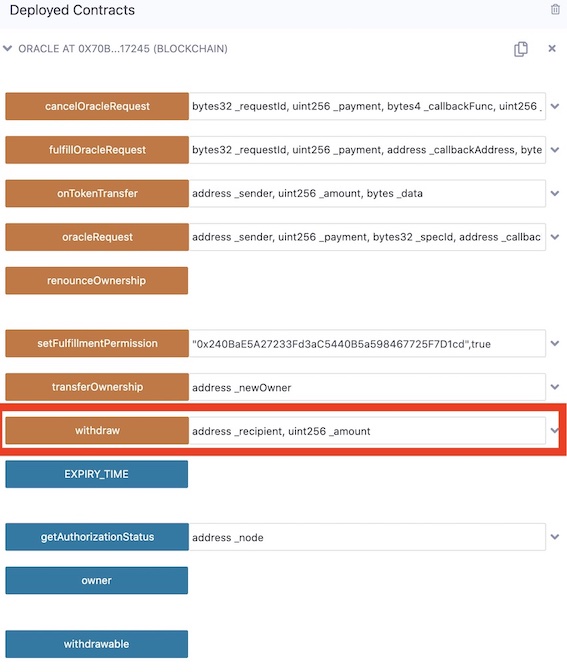
Paste the address you want to withdraw to, and specify the amount of LINK that you want to withdraw. Then, click withdraw. Confirm the transaction in MetaMask when the popup appears.